Guides and reports
Run any of our samples under a minute using Gitpod
By Julien Lengrand-Lambert, Lead Developer Advocate, Adyen

TL;DR : All our demos and integrations feature a "Open in Gitpod" button that lets you run the integration in a cloud IDE on a single button press.
As Developer Advocates, we are always searching for ways to make our integrations and demos easier to test and use. This is why we provide a `Dockerfile` for all of them for example, or why we offer a wide range of examples spanning across many stacks.
A couple months ago we discoveredGitpod, which is a tool that allows us to spin up fresh, automated development environments in the cloud in seconds.
Samples are typically a nice addition to understand a piece of technology next to documentation, but they still bring some friction. You have to clone the repository, set up your environment and run everything locally. Depending on how locked your work machine is, that may not even be possible. Gitpod solves all of those problems and lets you run any of our samples under a minute. Let's see how.
In this blog, we'll be usingour Java Spring examplebut it will work just as nicely with any of ourother examples.
Prerequisites: You need an Adyen test account to be able to run our samples, and create aset of API Keys ready to use.
Initial setup
To get our samples running smoothly, we will need to set up some environment variables in Gitpod. Head over to theGitpod variables page.You can login with any GitHub, Gitlab or Bitbucket account and Gitpod is free for up to 50 hours of usage a month.
There, we want to set the ADYEN_API_KEY, ADYEN_CLIENT_KEY, ADYEN_HMAC_KEY and ADYEN_MERCHANT_ACCOUNT variables. You can use your personal merchant account name and the information retrieved when creating your new set of API Key.

A screenshot of https://gitpod.io/variables with all ENV variables set
Lastly, you need to add gitpod.io to the list of allowed origins for your set of API credentials otherwise you will reach a CORS error.

Adding gitpod.io subdomains to the list of allowed origins
Note: It is not recommended to use wildcard domains in production for security reasons. For this specific set of keys on a test account, we can allow it. Alternatively, you can add the full URL to the gitpod workspace in the Allowed Origins section. The deployed application will run on an URL that looks something likehttps://adyenexampl-adyenkotlin-o4s0gnbktip.ws-eu54.gitpod.io. The URL will change every time you spin up a new instance of the gitpod environment.
Optional additional steps
By default, Gitpod will fire a typical vscode instance in the cloud, but you can set a number ofpreferences yourself. For example, IntelliJ is also supported, and you can link to a GitHub repository containing.dotfiles to have access to your aliases and custom settings easily.
Running the sample
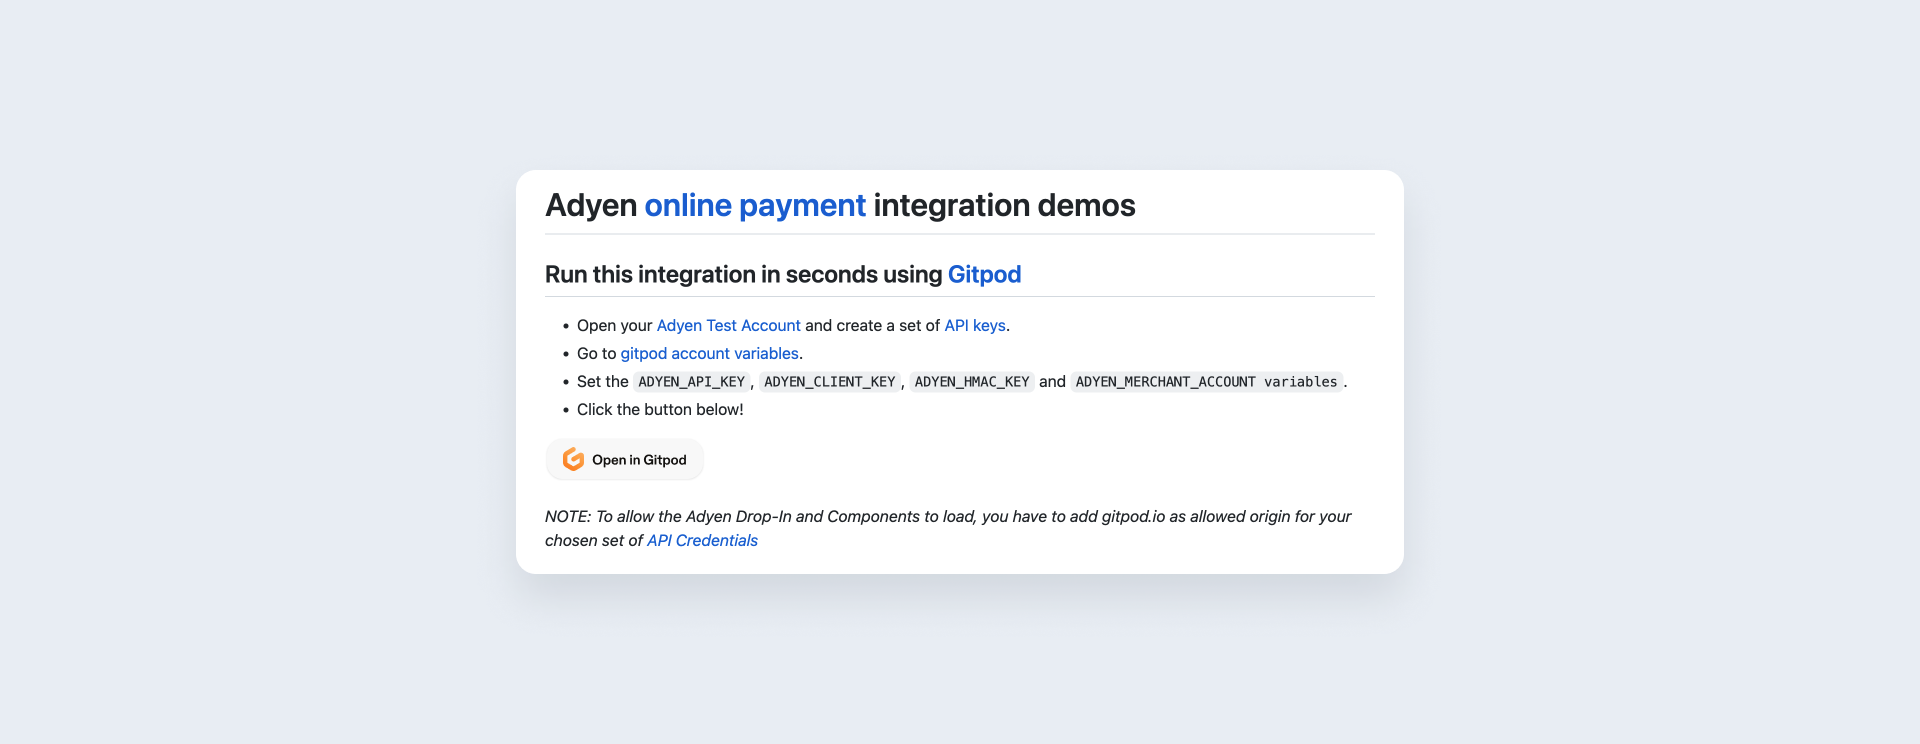
Once the initial setup is done, running a sample in Gitpod is as easy as clicking the "Open in Gitpod" button on any of our available samples. For example here onour Java sample:

The README with its "Open in Gitpod" button
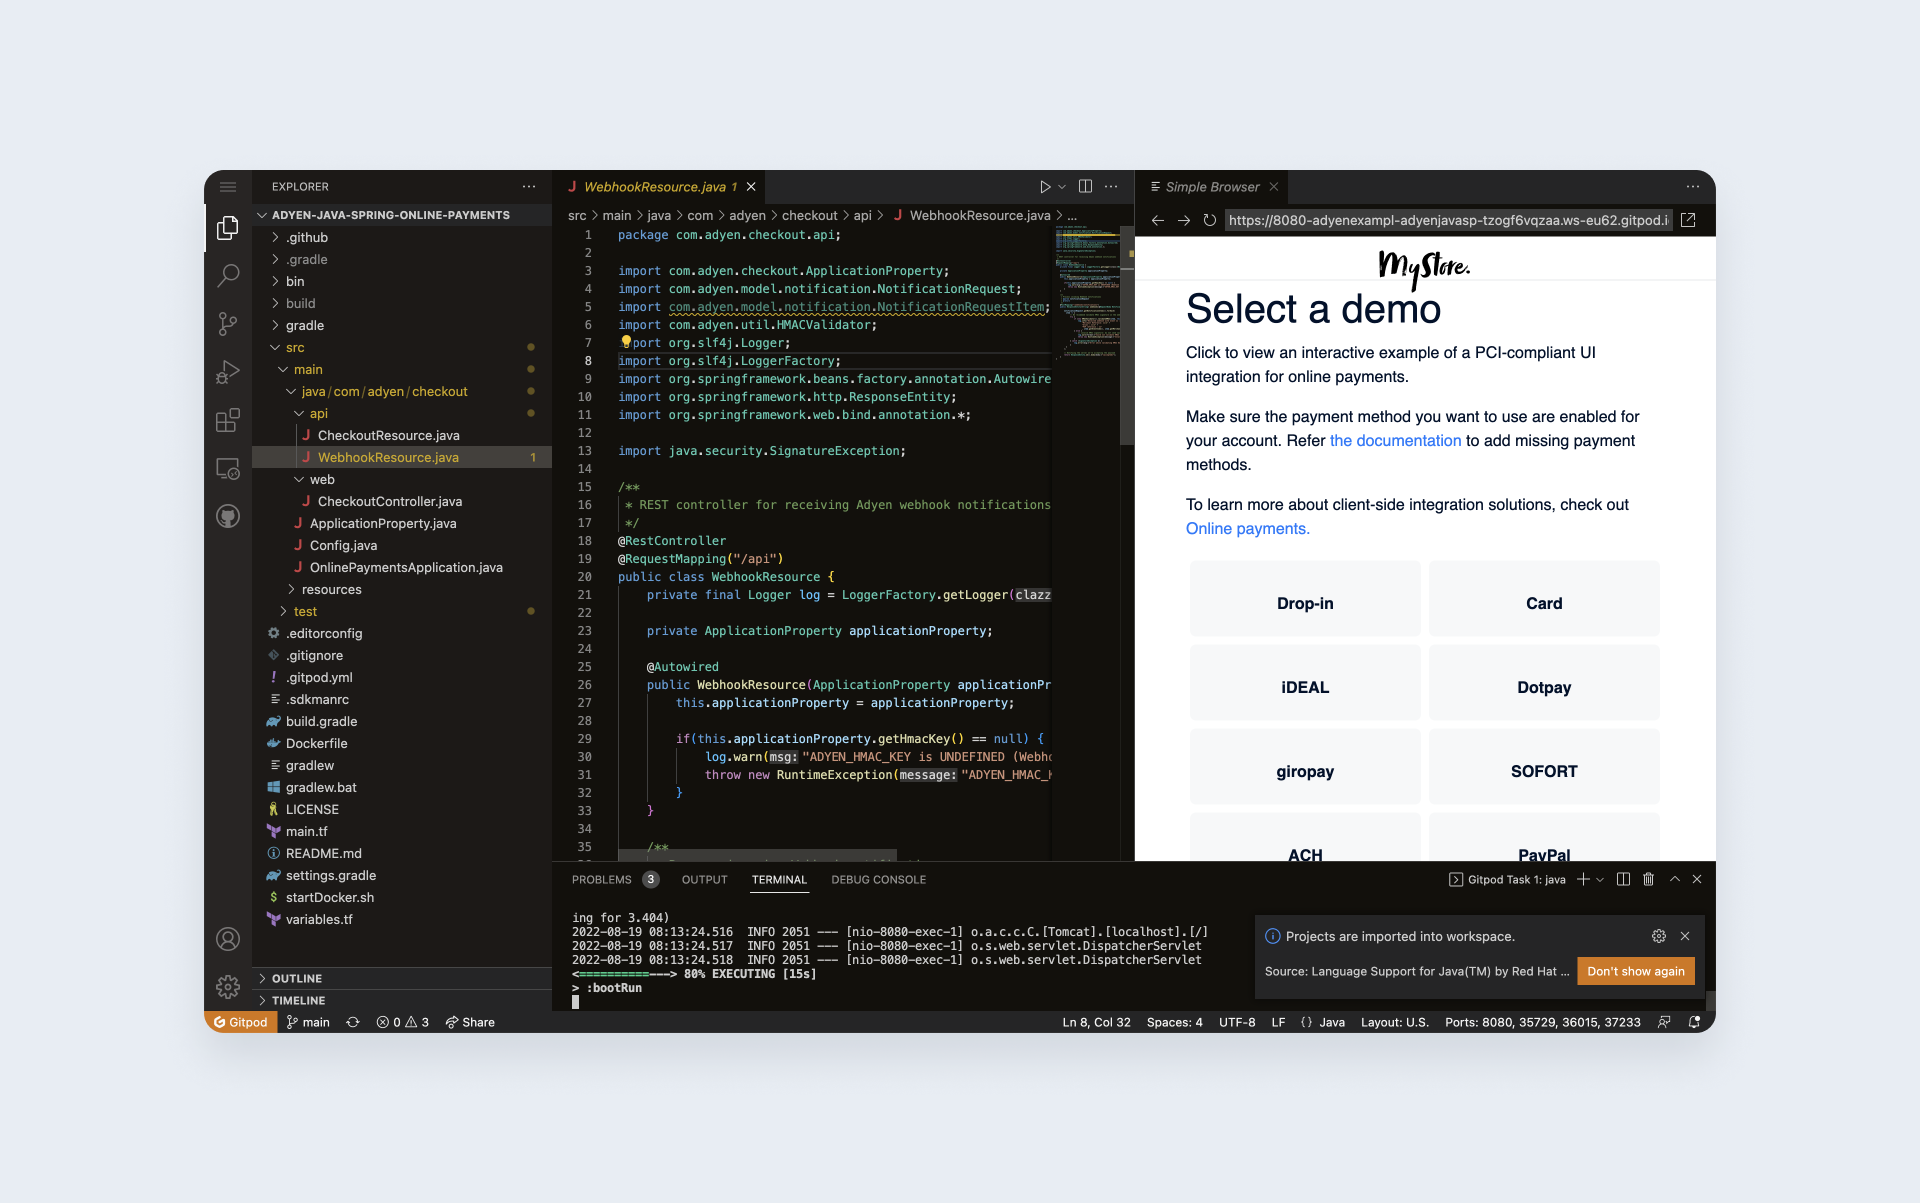
A new tab will open with a VSCode instance, load, compile, run the sample and even open a preview window without you having to do anything. You are ready to try the sample!

Our sample running in the cloud in Gitpod
By default, the sample is also made available to the wider internet for the duration of the sample so you can copy the URL indicated in the preview and share it with the rest of your team so they can try using the demo as well.
Gitpod is literally a complete IDE in the cloud, so you are most welcome to try and update the sample in any way you want, edit the code and / or the configuration to fit your testing needs.
Receiving webhook events
Receiving webhook events is also incidentally easier using Gitpod than on a traditional local setup for a simple reason : To receive webhook events you will need an address that is accessible from the internet. Typically, you would have to use a tool like ngrok for this.
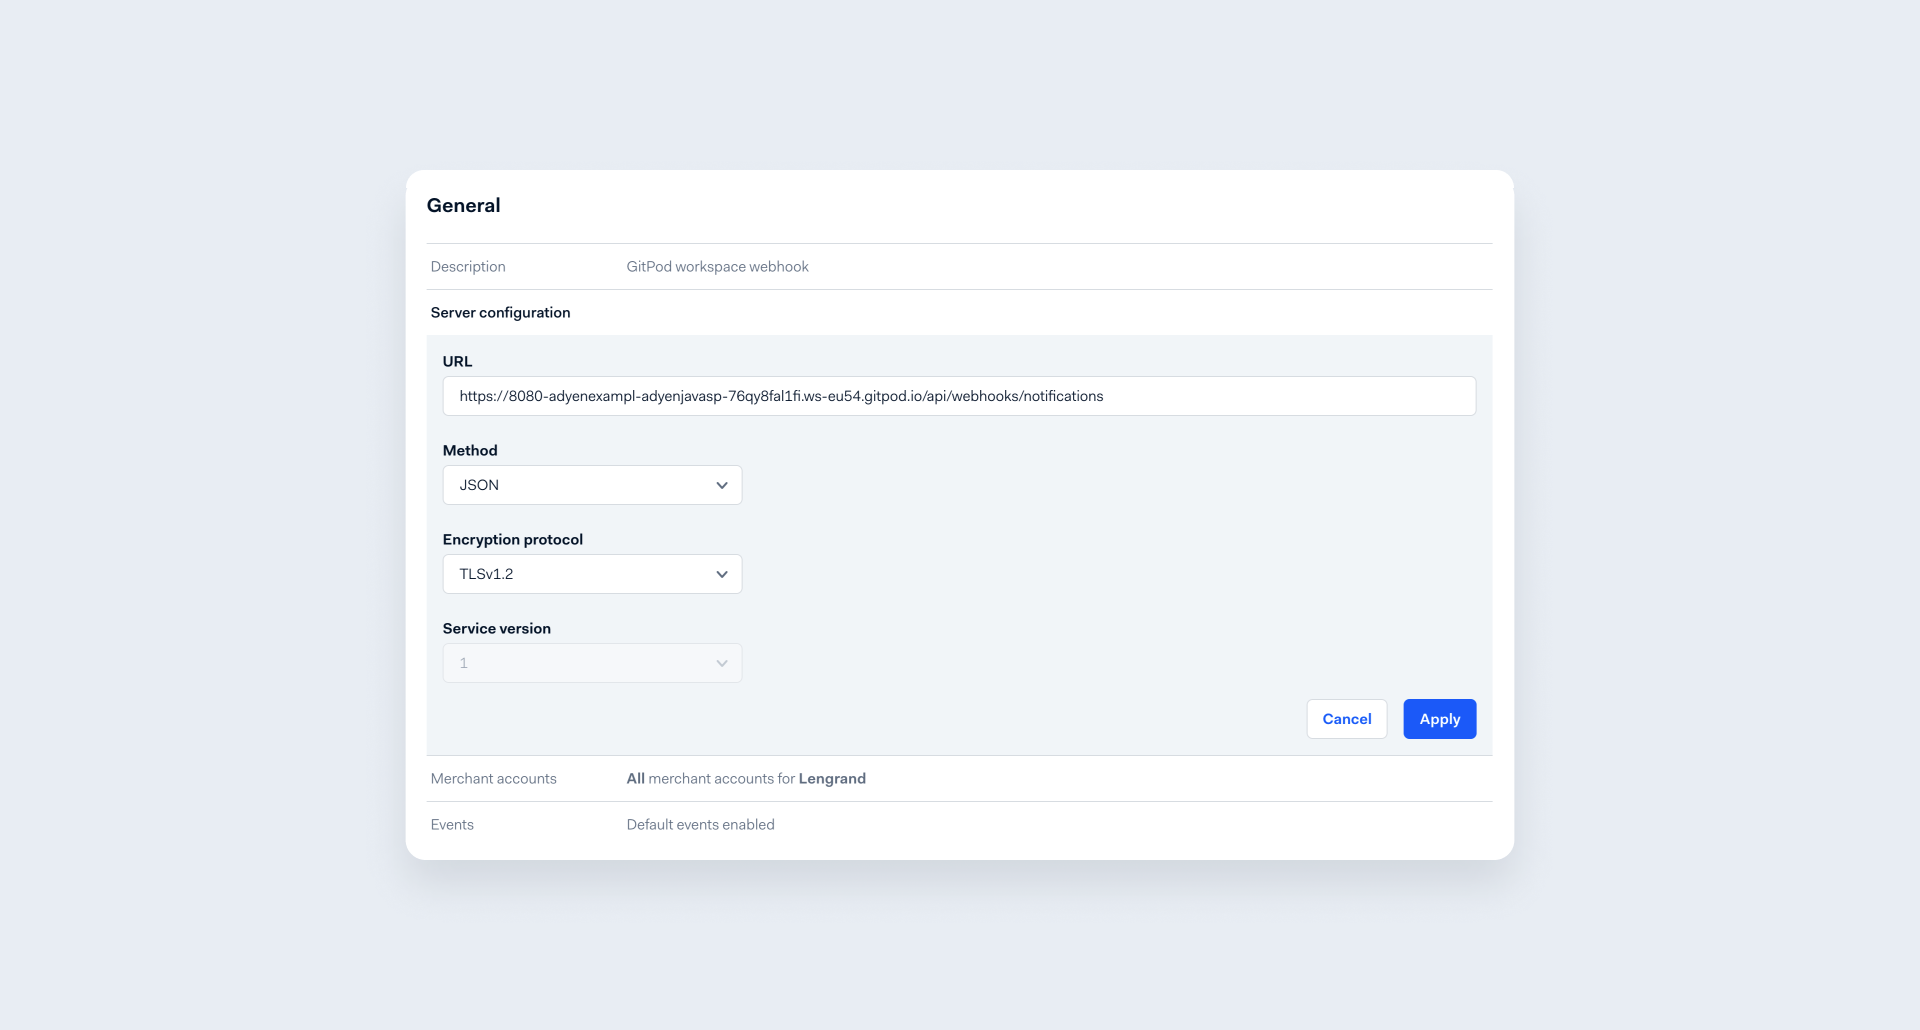
With Gitpod, your workspace is already available online so you can directly go to the customer area and set up a webhook for this specific address.
The default URL for webhooks ishttps://8080-your_gitpod_workspace.io/api/webhooks/notifications

Setting up a webhook to work with a Gitpod environment
Save, and voilà you will receive your webhook event notifications straight in your VSCode instance!
    2022-08-02 09:57:29.870  INFO 1441 --- [nio-8080-exec-7] com.adyen.checkout.api.WebhookResource   : Received webhook with event AUTHORISATION :
Merchant Reference: 9024876e-5881-4846-b54c-9c50352b12f7
Alias : null
PSP reference : PV4N8DRF9V5X8N82
Optional : "Local" setup and extensions.
The default cloud experience of Gitpod is more than fine for a quick run with the samples, but it is also important to keep the Developer Experience close to what you are used to.
When creating the workspace, Gitpod will offer you to run the workspace on your own installation of VSCode Desktop. The workspace will still be in the cloud, but you will be able to edit files from the editor you're used to and won't be closing the window by mistake.

Do you want to run the workspace in VS Code Desktop?
In the same way, for each sample we offer some relevant plugins to install to give you a better experience. For Java, the "Extension pack for Java" is a good example. You may decide to install it, or not depending on your preferences.

Do you want to install extensions for Java?
The actual setup
In case you are curious about how we made this possible, it all boils down to the `.gitpod.yml` file at the root of each sample. Let's quickly dive into it together.
tasks:
- init: ./gradlew bootJar
  command: |
        if [ -z ${ADYEN_HMAC_KEY+x} ] || [[ -z ${ADYEN_API_KEY+x} ]] || [[ -z ${ADYEN_CLIENT_KEY+x} ]] || [[ -z ${ADYEN_MERCHANT_ACCOUNT+x} ]]; then
            echo "Expected environment variables not found. Please set the ADYEN_HMAC_KEY, ADYEN_API_KEY, ADYEN_CLIENT_KEY, ADYEN_MERCHANT_ACCOUNT environment variables and rerun session https://gitpod.io/variables."
        else
            ./gradlew bootRun
        fi
# exposed ports
ports:
- port: 8080
  onOpen: open-preview
  visibility: public

vscode:
  extensions:
    - redhat.java
    - vscjava.vscode-java-debug
    - vscjava.vscode-java-test
    - pivotal.vscode-spring-boot
There actually isn't so much in it.
- The `init` allows Gitpod to create "prebuilds". They reduce wait time, by installing dependencies or running builds before you start a new workspace.
- The command is what is run every time you create a new workspace (by for example clicking on the "open in GitPod" button). It does two things : checking that your environment variables are set, and then start the Spring Boot application
- We expose the 8080 port, make it public so webhooks can reach it and finally ask Gitpod to open a preview once the application is started
- Finally, we propose a few useful extensions for installation in the cloud instance of VSCode.
In some of the samples, you might find an extra line :
    image:
 file: .gitpod.Dockerfile
This allows defining a specific Dockerfile to run as the basis image for the sample. And that's really all there is to it!
A word of conclusion
Gitpod is another way for us to make your experience with our samples as quick and frictionless as possible. We believe that the "one click to run" experience helps with this, and we are looking into further ways to improve the required initial key setup. Gitpod is not a replacement for your local IDE but it can help you understand integration with Adyen. It allows developers to make payments and understand our flow.
Of course, you are free not to use it, run locally or directly use any of our Dockerfiles. Or maybe even our terraform deployment script!
And if you have ideas on how we can further improve, make your voice heard and ping us onTwitteror directly raise an issue on any ofour samples!
Fresh insights, straight to your inbox
By submitting your information you confirm that you have read Adyen's Privacy Policy and agree to the use of your data in all Adyen communications.